Subversion Basics
This page will walk you through a simple example of using Subversion in Eclipse. It will outline how you perform the most important commands in Eclipse, such as committing changes and updating from the repository.
Creating a File
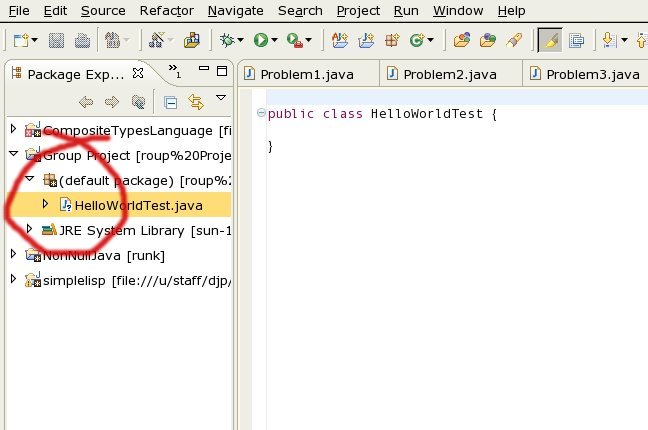
So, you've created your repository, setup its location within Eclipse and created a project folder. Now, you need to create a new file and load it into your Subversion repository. To do this, create a new Java file as you would normally in Eclipse (e.g. by right-clicking on the project folder and selecting "New"
then "Class"). Having done that, you'll see something like the following:
Notice that the icon beside your new file has a little question mark in the bottom right-hand corner.
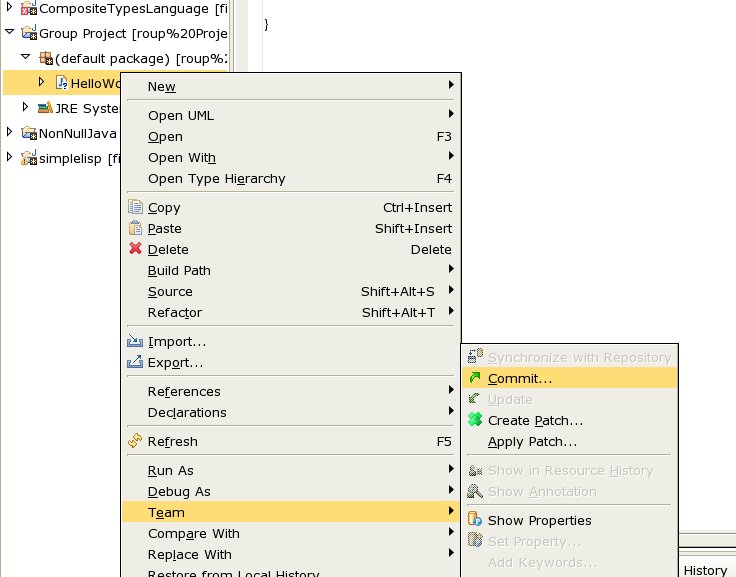
This means the file is not yet in your Subversion repository. To put into the repository you need to
commit the change you've made to the project (since creating a new file is counted as a change to the repository). To do this, right-click on the file (or, indeed, on the project folder), choose "Team" and then "Commit":
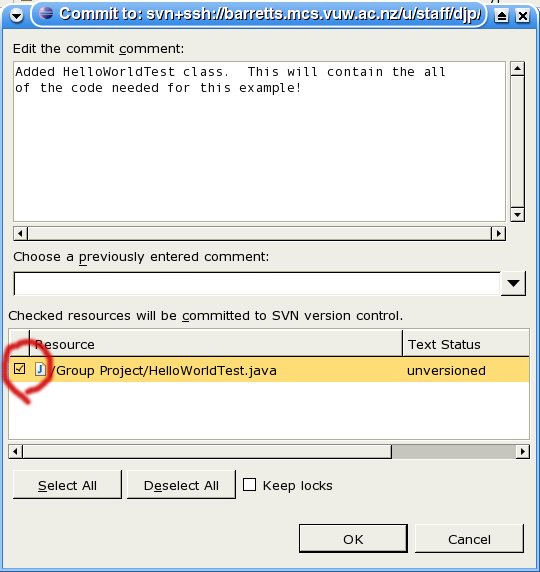
Selecting commit will take you to the commit window, where you need to enter an appropriate message describing the change you made (i.e. why you created the file). You also need to check the box next to the file you've just added, as illustrated below:
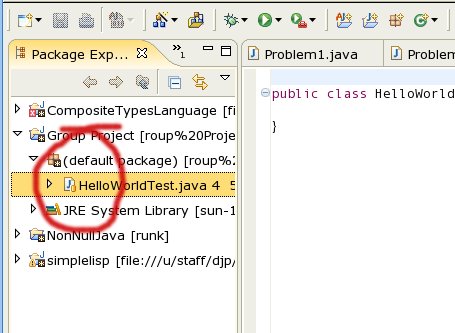
Now, click "OK" and Subversion will put the file into your Subversion repository. You should notice that the little icon next to your file has changed from a question mark to an orange cylinder:
Committing, Updating and Reverting Changes
Suppose you now make a change to one of the classes in your project. At some point (preferably sooner, rather than later), you will need to
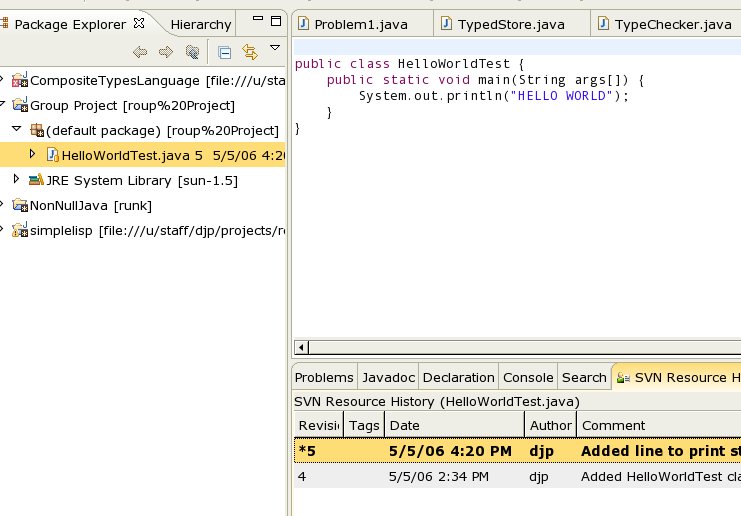
commit that change to the server. To do this, simply select "Team" and "Commit" (as you did above) and provide an appropriate log message. Having done that, you can look at the complete change history for the file in question by right-clicking on it, selecting "Team" and
then "Show in Resource History". This will bring up something like the following:
In the "SVN Resource History" tab, you can see the complete history of changes made to this file. This way, you can see what has been done to this file and by whom.
To
update your local copy of the project from the repository, right-click on the project, select "Team" and then "Update". Your files will then be updated with whatever changes your other team members have made!
Suppose you begin making changes to a file. Then, you decide you want to discard those changes without committing and get the original version back. This is called a
revert in the terminology of version control. To do this, right-click on the file in question (or the whole project if you want to revert the whole thing) and choose "Team", then "Revert".
Using the Synchronization Mode
Eclipse provides the synchronization option to allow fine control over what changes are committed or updated and to let you see what changes are being made. To use this option, select "Synchronize with Repository" from the "Team" menu. You will be asked if you want to switch to the "Team Sychronization Perspective". Choose "Yes" until you become more comfortable with this option. This will bring up the following:
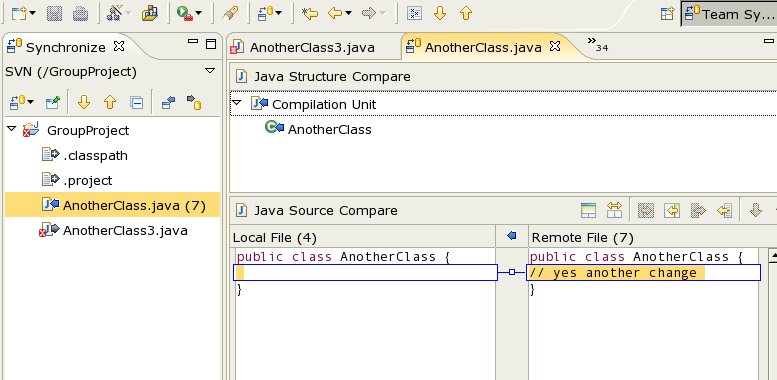
This perspective shows you two things: 1) the set of changes that will be committed to the subversion repository (shown with a right-arrow icon); 2) the set of changes that will be updated from the repository (shown with a left-arrow icon). Double clicking on a particular change will show a comparison of the local version with the repository version. You can then commit all the changes by selecting "Commit" from the "Team" menu as before. Likewise, you can update your local files by selecting "Update" from the "Team" menu. You can also choose to update/commit only some of the changes by right-clicking on them individually. When you are done, simply close the perspective.
That covers the basics for using Subversion with Eclipse. The
next tutorial will look at resolving conflicts if they occur.
Introduction | Creating a Repository | Subversion Basics | Dealing with Conflict.